
STEP 1:
First you will need to scrape all the pumpkin seeds out of the pumpkins and place in a bowl and fill with water. You don’t want to use Cold water; as your hands will be in this for a while and you don’t want to freeze them off. Luke warm to medium warm is great.
STEP 2: The Pumpkin seeds Float, thus making it easier to separate the Seeds from the “pulp” of the Pumpkin. Place all seeds in a strainer; and discard the pulp. Rinse the seeds, and lay them out on paper Towels and pat dry.
STEP 3: Follow the RECIPE:
Ingredients:
4 Cups Pumpkin Seeds ( you can adjust recipe to how many cups you have. But keep all ingredients proportional)
3 Teaspoons Worcestershire Sauce
3 Tablespoons Melted Butter
2 Teaspoons Seasoned Salt
Pinch or two Sea Salt
Directions
Preheat Oven to 250 Degrees F.
Place Pumpkin Seeds in a bowl; add Worcestershire Sauce, Butter, and Seasoned Salt. Stir until all seeds are well coated. Spread evenly on a large Cookie sheet and lightly sprinkle with Sea Salt.
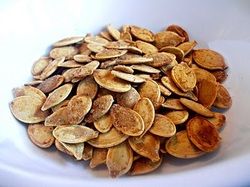
Bake in Oven 1-2 Hrs. Stir Seeds occasionally while “roasting” and spread evenly again on the cookie sheet before returning to baking; to ensure an even roast on all seeds. When finished Seeds should be Golden and crisp to the touch, but not so much so that they are hard. Let cool slightly and then enjoy! Be sure to have your Water on hand, as they do have a tendency to make you thirsty.
First you will need to scrape all the pumpkin seeds out of the pumpkins and place in a bowl and fill with water. You don’t want to use Cold water; as your hands will be in this for a while and you don’t want to freeze them off. Luke warm to medium warm is great.
STEP 2: The Pumpkin seeds Float, thus making it easier to separate the Seeds from the “pulp” of the Pumpkin. Place all seeds in a strainer; and discard the pulp. Rinse the seeds, and lay them out on paper Towels and pat dry.
STEP 3: Follow the RECIPE:
Ingredients:
4 Cups Pumpkin Seeds ( you can adjust recipe to how many cups you have. But keep all ingredients proportional)
3 Teaspoons Worcestershire Sauce
3 Tablespoons Melted Butter
2 Teaspoons Seasoned Salt
Pinch or two Sea Salt
Directions
Preheat Oven to 250 Degrees F.
Place Pumpkin Seeds in a bowl; add Worcestershire Sauce, Butter, and Seasoned Salt. Stir until all seeds are well coated. Spread evenly on a large Cookie sheet and lightly sprinkle with Sea Salt.
Bake in Oven 1-2 Hrs. Stir Seeds occasionally while “roasting” and spread evenly again on the cookie sheet before returning to baking; to ensure an even roast on all seeds. When finished Seeds should be Golden and crisp to the touch, but not so much so that they are hard. Let cool slightly and then enjoy! Be sure to have your Water on hand, as they do have a tendency to make you thirsty.

